Tuesday, 31 May 2011

Final Animation. End of.

************************************************************************************

To see FINAL ANIMATION, please click the link below (and imagine Bob Dylan's 'Blowin in The Wind' playing to it)


********************************************************

Wednesday, 18 May 2011

Dictionary Definition Photos... analysis and reflection

My piece, ‘Acquaintance and Passer-by’ is a photograph of the postman who has been delivering to my family home for years. It is observing the acceptable relationship in society between persons within a job role. Although he is very friendly, as he is working, there are some unspoken rules about what is OK, and what is not. This is why I felt the photo should be taken through a CCTV camera. This creates a sort of barrier between the viewer and him but also questions the kind of relationship a person has with someone to feel comfortable about capturing them on CCTV.

Reflection and Analysis of Animation

When creating each individual image, I deliberately ensured that an object or pattern continued on from each picture to the next. For example, the chair in ‘Day 8’ to ‘Day 9’ (below). 


This is because I intended for the images to be viewed in a continuous journey, so that when I animated them, one element could animate into the next, as a transition. It is essentially inviting the viewer to see through my eyes and watch the diary playing out to them.


Stop-Motion

I could have chosen to create a drawn animation, which would seem more logical due to much of the content being digital images. But instead, I decided to do a stop motion animation. I feel that some transitions benefit greatly from being made of a real 3D material, such as plasticine. They have a gravitational movement to them which I feel can never quite be reproduced in drawn animation.

End of the Foundation Course... Reflection

Well, I've defiantly found this project has taught me the basics of photoshop. I can use it pretty quickly and do a fair amount with it. Throwing myself into self teaching myself it has worked, although there's probably lots of quicker ways to do the things I've been doing, that I haven't discovered yet.
I spent a lot of time reflecting and analysing my work.


Composition

Each image is essentially a photo montage, with one image usually as the centre point. Everything else in the frame must compliment that image. Photos are layered up and often with filters on them to create the illusion of texture. I play with perspective as each image has its own depth and by layering these, it questions the audience’s viewpoint. This results in the conclusion that the image is not a still life, nor is it a landscape as nothing quite sits right within a setting. This creates some unease within the picture and I hope, brings interest to it.

I often use symmetry in the images, as this usually makes the main image catch the viewer’s attention but then the eye continues outwards, following the symmetry.

Many of the images have a sort of border around then, making them seem contained. The only images which are uncontained are those where my surroundings were the main focus, rather than the objects. However, I prefer those which are contained as it is easier for the eye to settle and observe the meaning of the images.


Colour

Each image has its own colour scheme, based on the main image. I think this is often subconciously influenced by my mood of the moment, not necessarily the mood I felt on the day of the diary.

I tend to enhance the colour of the main object in each image, as this draws the viewer’s eye to it and the background is usually faded or slightly desaturated so that it falls behind. However, the colour plays a much more important role in some of the images, as they directly represent a mood which I have written about in the diary entree for that day.


Thursday, 12 May 2011

So I need to think about presentation for the show. My animation is being put on the showreel along with other people, which I hope will be on the big screen in the Mac Room.
I need to create a ‘catalogue’ of 1000 or so words, but think I will merge this and the book which I have kept a diary in. The diary book also contains my plans of how I would turn each day into an image. This therefore also describes each piece, so acts as a sort of catalogue anyway. I will add extra information about each piece from a retrospective position, about the feel of the piece etc.
Need to do some sketches about the layout of this catalogue/diary/visual representation log. 
Also, I will arrange the dictionary definition photos along side part of a dictionary with the word in question highlighted.

Tuesday, 10 May 2011

Animation section 7


(http://www.youtube.com/watch?v=NmeOlc3CORw to view full screen and good quality)

Update


and
http://www.youtube.com/watch?v=jdmmB6ShdHI to see in full screen & better quality)

Newest bits of animation. Pleased with how it's going. Need to keep the pace up, due to deadlines and I must think ahead to which angle the camera needs to move to for the next shot.

Monday, 9 May 2011

Nocturnal


Another 5 hours of animating last night. Spent the first half hour just trying to get the lighting the same as the last shot I took the night before. The lighting was in exactly the same places, the camera on all the same settings, and yet it was much more yellow. I tried adjusting the lighting, turning some off, moving some closer or further away... but it was never quite the same. I wonder if it could have been because the last shot I took last night, was when the lamps had been on for 3 hours or so... and I was trying to take the next one having just turned them on. Maybe they become brighter over time. I ended up taking the photos on a different setting on the camera, but tonight I will try and turn the lights on for a while before I begin animating. However, I feel I should keep an eye on them, because they get so hot.


I'm going to try to take up the sides of the blinds in my room, to see if I can get the lighting the same as at night. If I can, then I can get a lot more animating done during the day aswell, to save me actually turning nocturnal.


Also planned 4 new dictionary definition photos. But of course, I can only take these once I have access to my camera again after animating.

Sunday, 8 May 2011

Helpful...

Also, my camera has decided that it will reset its photo naming counter back to 0001 every time i turn it off. But if there's already a photo with that name (which of course, there is) it saves it as 0001_1, which then results in it mixing within the other photos. This has resulted in me having to spend alot of time sorting them out. I will now keep a close eye on what and where it is saving the photos.

Animating


(to see full screen click http://www.youtube.com/watch?v=v1_i5pXgPFQ )

Above is the beginning section created during the first night of animating. Last night was day 2 of animating. I decided to animate after the sun has gone down, at around 9pm because the blinds in my room are pathetic, making controlling the lighting impossible during the day. However, working at this time is difficult, being so anti-social. It also means that I cannot use my camera for other work during the day, because it cannot be moved from it's stand incase I accidentally move it, and ruin the movement of the animation.

Had to take some of the photos with my hand in them, propping stuff up. I will now have to edit my hand out, which is very time consuming so I will try to find something thinner to prop stuff up so I can edit it out more easily and quicker.

Thursday, 5 May 2011

Test shots


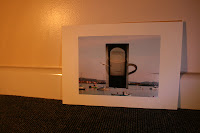
Did lots of test photos adjusting composition, which I wanted to show a little of the wall above the photo, and also some of the floor to leave space for animations which use the floor to move to the next photo.

I also adjusted the white balance and decided on 7000k. This also twinned with the lighting, which is proving quite difficult. It must not create a shine on the photo, and I would like the animation to have quite a dark, nostalgic, looking-through-someone's-memories feel to it. I have set up an orangey lamp and smaller more artificial spotlight, which I will have to move around with the animation to illuminate things as they happen.


With the camera set up like this, (not zoomed in at all) the individual elements in the photos that are actually being animated (such as the boat in my test video below) are very small and I'm concerned that it will be difficult for the viewer to spot them being animated. And this is at the point where the camera is closest to the photo throughout the whole animation. So, this would only become more of a problem throughout the animation. Here is my test video of the transitional animation between 'Day 1' to 'Day 2'.

(can be watched full screen at http://www.youtube.com/watch?v=Cv4O1Ti8DV8)

Can always print the photos off again, larger with a smaller border. Or, I could zoom in, sacrificing some of the wall above the photo, and zoom in even more when the camera is furthest from the photos.

It exists!

The drawing looked like this in the end. (see below) I added a piece of wood at 90 degrees on top of the main wooden piece for the camera stand to be strapped to for extra support. The piece of metal between the bottom piece and the rotating piece began as a large washer. This did stop friction but wasn't wide enough, resulting in it all rocking from side to side a little. But any amount it too much when you're animating. Therefore, replaced this with large circular disk that began life as part of a cafetiere. This is about 8cm diameter, so it does the job alot better. The wooden bottom piece that it all spins on could have done with being a little bigger, but as long as I move it slowly and carefully (which I would be doing anyway), it's perfect. Thank you so much John from the workshop for helping me with this and enabling this to cost me 99p to make!


Sorry about the slightly crude quality photos below. Obviously couldn't take the photo with my nice camera... as it's in the photo...


Wednesday, 4 May 2011

Camera Dolly

Due to narrow stairs, health and safety and whatnot, I will not be able to animate on stairs. I've now decided to animate a panning shot where the camera travels 3/4 of a 30cm diameter circle. It will also rotate to be facing outwards at all times, to view the animations which will be happening on 3 walls of a room.
(click photo to enlarge)

SIDE VIEW